
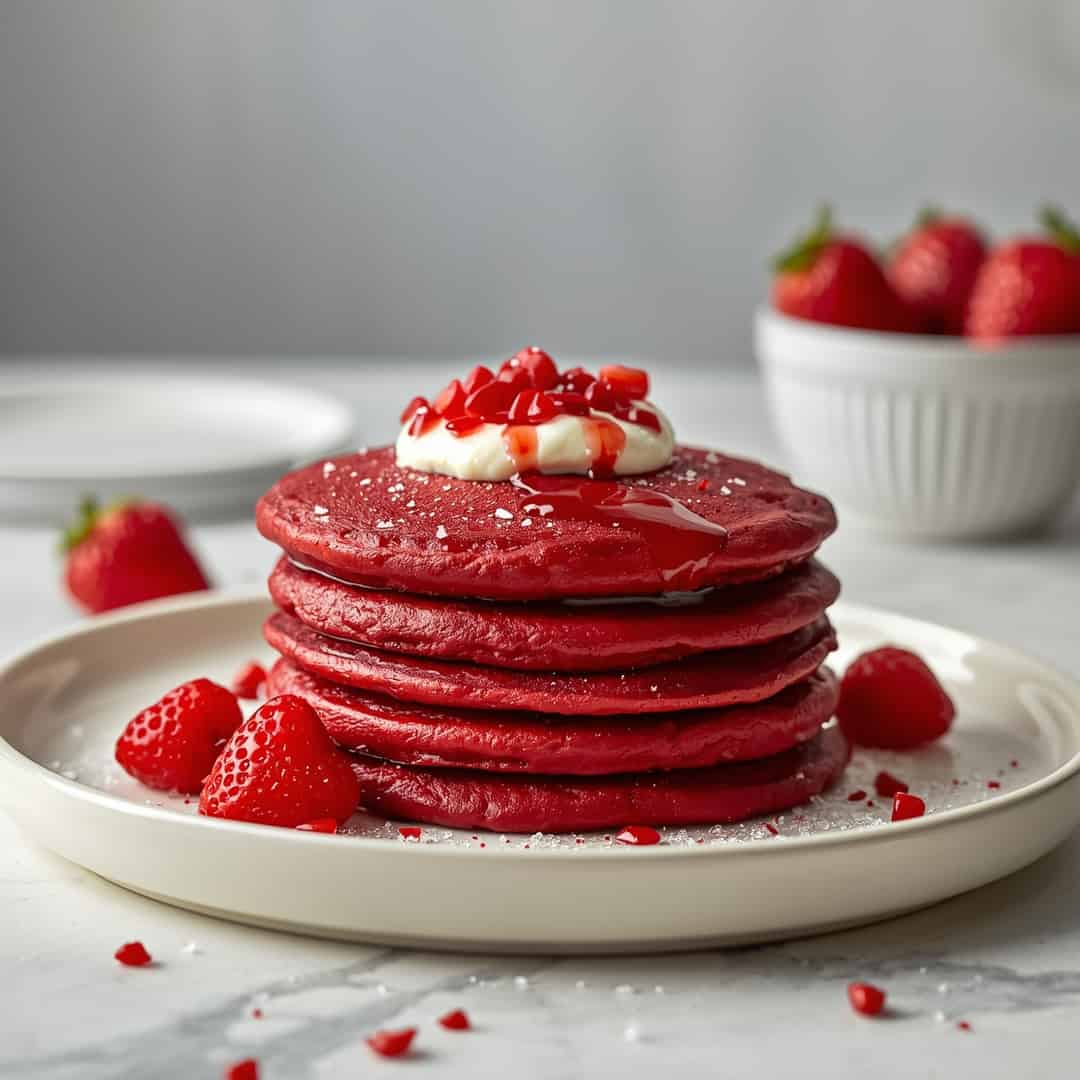
Red Velvet Pancakes are a delightful and surprisingly easy way to elevate your breakfast or brunch game, offering a stunning visual appeal and a rich, decadent flavor that’s perfect for any occasion. This recipe is your ticket to enjoying this iconic dessert-inspired breakfast without the fuss, making it a useful addition to any home cook’s repertoire.
Key Ingredients for Red Velvet Pancakes
- All-Purpose Flour: 1 ½ cups
- Granulated Sugar: 2 tablespoons
- Baking Powder: 1 ½ teaspoons
- Salt: ½ teaspoon
- Unsweetened Cocoa Powder: 2 tablespoons (for that classic red velvet taste and color hint)
- Red Food Coloring: 1-2 tablespoons (gel or liquid, adjust for desired intensity)
- Buttermilk: 1 ¼ cups (or 1 ¼ cups regular milk with 1 tablespoon lemon juice or white vinegar, let sit for 5 minutes)
- Eggs: 2 large, at room temperature
- Melted Butter: 3 tablespoons, unsalted, plus extra for greasing the griddle
- Vanilla Extract: 1 teaspoon
Optional Toppings:
- Whipped Cream
- Cream Cheese Glaze (powdered sugar, cream cheese, milk, vanilla)
- Fresh Berries (strawberries, raspberries)
- Chocolate Chips
- Powdered Sugar for dusting
How to Make Red Velvet Pancakes
Whip up a batch of these incredible Red Velvet Pancakes in under 30 minutes, proving that delicious and visually stunning can also be incredibly simple. The secret lies in the straightforward batter and the vibrant, yet classic, red velvet flavor profile that will have everyone asking for seconds.
Step-by-Step Instructions
- Combine Dry Ingredients: In a large mixing bowl, whisk together the all-purpose flour, granulated sugar, baking powder, salt, and unsweetened cocoa powder. This ensures that all the leavening and flavoring agents are evenly distributed throughout the batter, leading to consistently fluffy pancakes.
- Prepare Wet Ingredients: In a separate medium bowl, whisk together the buttermilk, eggs, melted butter, and vanilla extract. It’s crucial to have your eggs at room temperature for easier incorporation into the batter, resulting in a smoother consistency. This is also where you’ll add your red food coloring. Start with 1 tablespoon and add more gradually until you achieve your desired vibrant red hue. Remember that the color will slightly deepen as it bakes.
- Combine Wet and Dry: Pour the wet ingredients into the dry ingredients. Using a whisk or a spatula, gently mix until just combined. It’s important not to overmix the batter at this stage. A few lumps are perfectly fine; overmixing can develop the gluten in the flour too much, leading to tough pancakes.
- Preheat and Grease the Griddle: Heat a lightly oiled griddle or non-stick frying pan over medium heat. You can test if your griddle is ready by flicking a few drops of water onto it; they should sizzle and evaporate quickly. Ensuring the griddle is at the right temperature is key to achieving golden-brown edges and a cooked-through center.
- Cook the Pancakes: Pour ¼ cup of batter per pancake onto the hot griddle. Cook for 2-3 minutes per side, or until bubbles form on the surface and the edges look set. Flip carefully with a spatula and cook for another 2-3 minutes until cooked through.
- Serve Immediately: Transfer the cooked Red Velvet Pancakes to a plate. Serve hot with your favorite toppings like whipped cream, fresh berries, a drizzle of cream cheese glaze, or a dusting of powdered sugar for the ultimate indulgence.
Why You’ll Love This Red Velvet Pancakes
You’ll absolutely adore these Red Velvet Pancakes not just for their stunning ruby-red hue, but for the incredibly moist and tender crumb that melts in your mouth. Unlike traditional pancakes, these boast a subtle yet distinct chocolatey undertone that’s uniquely red velvet, offering a delightful twist that’s sure to impress. Making them at home is also wonderfully cost-effective, allowing you to enjoy this decadent breakfast often without the restaurant price tag.
The charm of these pancakes lies in their versatility; they are a blank canvas for your favorite sweet toppings, from classic whipped cream and fresh berries to a luxurious cream cheese glaze that perfectly complements the chocolate notes. They are an instant upgrade from your everyday pancake, transforming a simple meal into a special occasion. So, why wait? Treat yourself and your loved ones to these magical Red Velvet Pancakes – you won’t regret it!
Storing and Reheating Tips
Leftover Red Velvet Pancakes can be stored in an airtight container in the refrigerator for up to 3-4 days. For longer storage, you can freeze them. Ensure the pancakes have cooled completely before storing.
To Reheat:
- From Refrigerator: Place pancakes on a microwave-safe plate and heat for 30-60 seconds, or until warmed through. For crispier edges, reheat in a toaster oven or a dry skillet over medium-low heat for a few minutes per side.
- From Freezer:
- Microwave: Remove from freezer bag, place on a microwave-safe plate, and microwave in 30-second intervals until heated through.
- Toaster Oven/Skillet: Allow pancakes to thaw slightly at room temperature for about 10-15 minutes before reheating in a toaster oven at 350°F (175°C) for 5-7 minutes, or in a dry skillet over medium-low heat until warmed through.
Final Thoughts
These Red Velvet Pancakes are a truly special treat that brings joy and a burst of color to any breakfast table. Give them a try for a delicious and memorable meal that’s surprisingly simple to achieve. You’ll be delighted by the taste and the smiles they bring!
Red Velvet Pancakes
Ingredients
Equipment
Method
- In a large mixing bowl, whisk together the all-purpose flour, granulated sugar, baking powder, salt, and unsweetened cocoa powder. This ensures that all the leavening and flavoring agents are evenly distributed throughout the batter, leading to consistently fluffy pancakes.1 1/2 cups All-Purpose Flour, 2 tablespoons Granulated Sugar, 1 1/2 teaspoons Baking Powder, 1/2 teaspoon Salt, 2 tablespoons Unsweetened Cocoa Powder
- In a separate medium bowl, whisk together the buttermilk, eggs, melted butter, and vanilla extract. It’s crucial to have your eggs at room temperature for easier incorporation into the batter, resulting in a smoother consistency. This is also where you’ll add your red food coloring. Start with 1 tablespoon and add more gradually until you achieve your desired vibrant red hue. Remember that the color will slightly deepen as it bakes.1 1/4 cups Buttermilk, 2 large Eggs, 3 tablespoons Melted Butter, 1 teaspoon Vanilla Extract, 1-2 tablespoons Red Food Coloring
- Pour the wet ingredients into the dry ingredients. Using a whisk or a spatula, gently mix until just combined. It’s important not to overmix the batter at this stage. A few lumps are perfectly fine; overmixing can develop the gluten in the flour too much, leading to tough pancakes.
- Heat a lightly oiled griddle or non-stick frying pan over medium heat. You can test if your griddle is ready by flicking a few drops of water onto it; they should sizzle and evaporate quickly. Ensuring the griddle is at the right temperature is key to achieving golden-brown edges and a cooked-through center.3 tablespoons Melted Butter
- Pour ¼ cup of batter per pancake onto the hot griddle. Cook for 2-3 minutes per side, or until bubbles form on the surface and the edges look set. Flip carefully with a spatula and cook for another 2-3 minutes until cooked through.
- Transfer the cooked Red Velvet Pancakes to a plate. Serve hot with your favorite toppings like whipped cream, fresh berries, a drizzle of cream cheese glaze, or a dusting of powdered sugar for the ultimate indulgence.Whipped Cream, Fresh Berries, Cream Cheese Glaze, Powdered Sugar for dusting
Notes
From Freezer: Microwave: Remove from freezer bag, place on a microwave-safe plate, and microwave in 30-second intervals until heated through. Toaster Oven/Skillet: Allow pancakes to thaw slightly at room temperature for about 10-15 minutes before reheating in a toaster oven at 350°F (175°C) for 5-7 minutes, or in a dry skillet over medium-low heat until warmed through.