
Fuel your fitness journey with these incredibly simple and satisfying No-Bake Post-Workout Protein Balls, the perfect on-the-go solution for muscle recovery and sustained energy after any strenuous activity. They offer a delicious and convenient way to replenish your body without any heating required, making them a staple for any active lifestyle.
Key Ingredients for No-Bake Post-Workout Protein Balls
- 1 cup rolled oats (ensure they are gluten-free if needed)
- 1/2 cup natural peanut butter (or your favorite nut/seed butter)
- 1/3 cup honey or maple syrup (for a vegan option)
- 2 tablespoons chia seeds
- 2 tablespoons flaxseed meal
- 1/4 cup protein powder (whey, plant-based, or your preferred type)
- 1 teaspoon vanilla extract
- A pinch of salt (optional, especially if your nut butter is unsalted)
- Optional additions: 2 tablespoons mini chocolate chips, shredded coconut, or chopped nuts
How to Make No-Bake Post-Workout Protein Balls
Whip up these delicious and satisfying No-Bake Post-Workout Protein Balls in mere minutes! This recipe is incredibly easy, requiring no baking whatsoever, and delivers a burst of flavor and essential nutrients in every bite. With a preparation time of just 15 minutes, you’ll have a batch of these wholesome treats ready to fuel your recovery or power through your day.
Step-by-Step Instructions
- Combine Dry Ingredients: In a medium-sized mixing bowl, add the rolled oats, chia seeds, flaxseed meal, protein powder, and a pinch of salt (if using). Stir everything together until well combined, ensuring there are no clumps of protein powder.
- Add Wet Ingredients: To the dry ingredients, add the natural peanut butter, honey or maple syrup, and vanilla extract.
- Mix Thoroughly: Begin mixing the ingredients together. It’s often easiest to use a spatula or sturdy spoon at first, but as the mixture thickens, you may find it easier to use your hands. Continue mixing and kneading until all ingredients are fully incorporated and a slightly sticky dough forms. If the mixture seems too dry and crumbly, add a teaspoon of water or nut butter at a time until it starts to hold together. If it’s too wet, add a tablespoon more oats.
- Incorporate Optional Add-ins: If you’re using any optional additions like mini chocolate chips, shredded coconut, or chopped nuts, gently fold them into the mixture now until evenly distributed.
- Roll into Balls: Take about a tablespoon of the mixture and roll it between your palms to form a compact ball. Continue this process until all the mixture has been used. Aim for uniform size so they cook (or set) evenly.
- Set and Chill: Place the rolled protein balls on a plate or baking sheet lined with parchment paper. Transfer the plate to the refrigerator for at least 30 minutes. This chilling time allows the balls to firm up and become less sticky, making them easier to handle and enjoy.
Why You’ll Love This No-Bake Post-Workout Protein Balls
You’ll absolutely adore these No-Bake Post-Workout Protein Balls for their effortless elegance and incredible post-workout power. Their primary appeal lies in their speed and simplicity, offering a no-fuss way to refuel your body after a tough session, much like a quick smoothie but in a portable, bite-sized form. The affordability of making these at home is a significant perk; compared to expensive pre-made protein bars, these homemade gems are incredibly budget-friendly, utilizing pantry staples you likely already have.
What truly elevates these balls are the delightful, customizable add-ins. Imagine the satisfying chew of whole oats, the subtle crunch of chia seeds, and the creamy richness of peanut butter all coming together. The optional mini chocolate chips add a touch of indulgence without derailing your health goals, making them a genuinely craveable treat. Unlike bland, chalky protein snacks, these offer a delightful balance of texture and flavor that will leave you feeling satisfied and energized. Don’t just take our word for it; whip up a batch of these No-Bake Post-Workout Protein Balls today and experience the difference!
Storing and Reheating Tips
Storing your No-Bake Post-Workout Protein Balls is straightforward and ensures you have readily available fuel whenever needed.
- Refrigeration: The best method for storing these protein balls is in an airtight container in the refrigerator. They will stay fresh for up to 1-2 weeks. Refrigeration helps them maintain their shape and prevents them from becoming too soft.
- Freezing: For longer storage, you can freeze your protein balls. Place them in a single layer on a baking sheet lined with parchment paper and freeze until firm. Once frozen, transfer them to a freezer-safe bag or container. They can be stored in the freezer for up to 2-3 months.
- Reheating/Enjoying from Frozen: There is no need to “reheat” these. If taking them directly from the freezer, you can enjoy them frozen for a firmer, more ice-cream-like texture, or let them sit at room temperature for about 10-15 minutes to soften slightly before consuming. They are designed to be enjoyed cold or at room temperature.
Final Thoughts
These No-Bake Post-Workout Protein Balls are a game-changer for anyone seeking quick, healthy, and delicious recovery fuel. Give them a try; you’ll be delighted by how easy and rewarding it is to nourish your body with these homemade bites!
try also :
- Air Fryer Sweet Potatoes
- Crockpot Beef Fajitas
- Ground Turkey Sweet Potato Bake
- Cheesy Pumpkin Stuffed Pretzel Bites
- Find more in Pinterest
- Medium
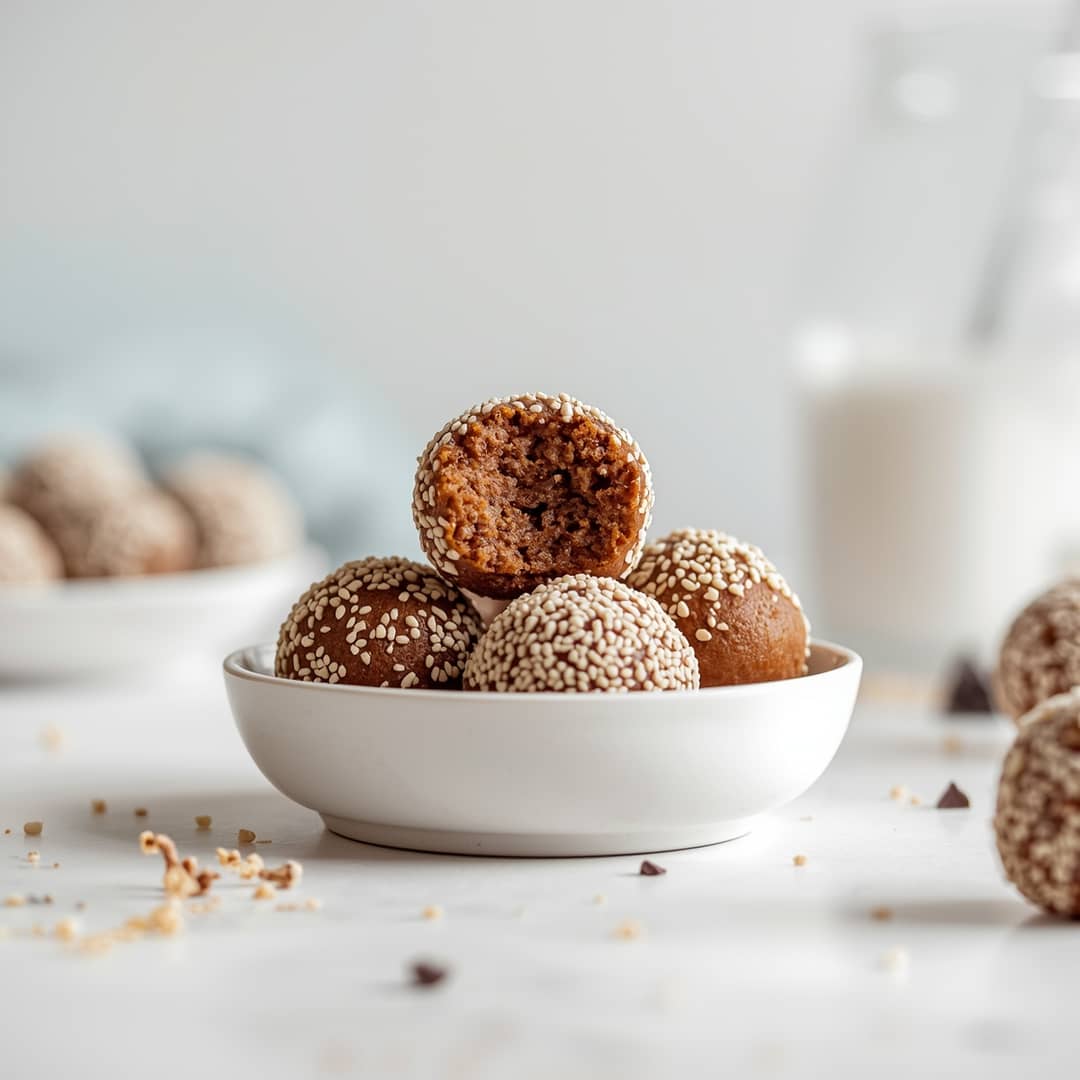
No-Bake Post-Workout Protein Balls
Ingredients
Equipment
Method
- In a medium-sized mixing bowl, add the rolled oats, chia seeds, flaxseed meal, protein powder, and a pinch of salt (if using). Stir everything together until well combined, ensuring there are no clumps of protein powder.1 cup rolled oats, 2 tablespoons chia seeds, 2 tablespoons flaxseed meal, 1/4 cup protein powder, 1 pinch salt
- To the dry ingredients, add the natural peanut butter, honey or maple syrup, and vanilla extract.1/2 cup natural peanut butter, 1/3 cup honey, 1 teaspoon vanilla extract
- Begin mixing the ingredients together. It’s often easiest to use a spatula or sturdy spoon at first, but as the mixture thickens, you may find it easier to use your hands. Continue mixing and kneading until all ingredients are fully incorporated and a slightly sticky dough forms. If the mixture seems too dry and crumbly, add a teaspoon of water or nut butter at a time until it starts to hold together. If it’s too wet, add a tablespoon more oats.
- If you’re using any optional additions like mini chocolate chips, shredded coconut, or chopped nuts, gently fold them into the mixture now until evenly distributed.2 tablespoons mini chocolate chips, 2 tablespoons shredded coconut, 2 tablespoons chopped nuts
- Take about a tablespoon of the mixture and roll it between your palms to form a compact ball. Continue this process until all the mixture has been used. Aim for uniform size so they cook (or set) evenly.
- Place the rolled protein balls on a plate or baking sheet lined with parchment paper. Transfer the plate to the refrigerator for at least 30 minutes. This chilling time allows the balls to firm up and become less sticky, making them easier to handle and enjoy.